


So, in this blog we will be creating our first K8s Cluster with nginx running using Minikube.☸
What is a Minikube?
Minikube is an open-source, lightweight tool which enables Kubernetes implementation that creates a VM on your local machine and deploys a simple cluster containing only one node.
Minikube is available for Linux, macOS, and Windows systems.
Features of minikube
Supports the latest Kubernetes release (+6 previous minor versions)
Cross-platform (Linux, macOS, Windows)
Deploy as a VM, a container, or on bare-metal
Multiple container runtimes (CRI-O, containerd, docker)
Direct API endpoint for blazing-fast image load and build
Advanced features such as Load Balancer, filesystem mounts, Feature Gates, and network policy
Addons for easily installed Kubernetes applications
Supports common CI environments
Kubernetes vs Minikube
Kubernetes and Minikube are two popular tools used for managing containerized applications. While both are used in the context of containers and orchestration, there are key differences between the two.
Deployment Scale: Kubernetes is designed for large-scale deployments across multiple nodes and clusters, making it suitable for managing complex and distributed environments. On the other hand, Minikube is a lightweight and simplified version of Kubernetes, primarily used for local development and testing purposes. It allows developers to run a single-node Kubernetes cluster on their local machines.Resource Requirements: Kubernetes requires a significant amount of resources to operate efficiently, as it is intended for managing large-scale deployments. It needs multiple nodes and clusters for full functionality, making it more suitable for production environments. In contrast, Minikube is designed to run on a single machine with minimal resource requirements, making it ideal for local development or running Kubernetes on a small scale.Infrastructure Flexibility: Kubernetes can be deployed on various cloud providers, such as AWS, Google Cloud Platform, and Azure, allowing users to take advantage of their preferred infrastructure. It also supports on-premises deployments. On the other hand, Minikube is primarily focused on running on local machines and supports only a limited set of drivers for virtualization or containerization, such as VirtualBox, VMware, and Docker.Networking and Load Balancing: Kubernetes offers a highly configurable and advanced networking model that enables seamless connectivity between containers and services. It provides various options for load balancing and exposes services externally through an ingress controller. In contrast, Minikube simplifies networking by using a single-node configuration with a basic networking setup, limiting its capabilities for complex network configurations.Cluster Management: Kubernetes provides extensive cluster management features, including scaling applications, managing updates, and handling node failures. It also offers sophisticated scheduling and resource allocation mechanisms. Minikube, being a lightweight tool, lacks some of these advanced cluster management capabilities. It focuses more on providing a simplified local environment rather than comprehensive cluster management.Ecosystem and Community Support: Kubernetes has a large and active community, with a vast ecosystem of tools and resources available. It is widely adopted by organizations and benefits from ongoing development and enhancements. Minikube, although part of the Kubernetes ecosystem, has a smaller community and is more focused on providing a lightweight development environment.
In summary, Kubernetes is a powerful and feature-rich platform for managing large-scale containerized applications, suitable for production environments and complex deployments. Minikube, on the other hand, is a lightweight tool primarily used for local development and testing, offering simplicity and ease of use.
What are Pods?
Pods are the smallest deployable units of computing that you can create and manage in Kubernetes. Pods are ephemeral by nature, if a pod (or the node it executes on) fails, Kubernetes can automatically create a new replica of that pod to continue operations.
A Kubernetes pod is a group of one or more containers running instances of an application. Worker machines called Nodes host pods and create a configured environment for containers to run efficiently. This includes providing dependencies and resources such as:
Storage: Stores data in volumes shared amongst containers.
Networks: Provide internal IP addresses that allow the containers to communicate with each other using localhost.
Configuration information: Have information on how to run each container, such as what port to use or the image version of the container.
Types of Installation of K8s
Mini Kube (Docker Inside Docker DIND) → least use in Prod → Easiest
Kubeadm → Baremetal (open-source tool) → Used in Prod → Intermediate
Managed K8s Cluster
AWS → EKS (Elastic Cloud Kubernetes)
Azure → AKS (Azure Kubernetes Service)
GCP → GKE (Google Kubernetes Engine)
KIND (Kubernetes in Docker)
Installation of Minikube
There are a few steps to setup Minikube on your local machine.
First Go to AWS(Amazon Web Services) lunch a instance take the t2-medium because minikube takes more stores than it needs on 4GB RAM.

Now update your machine.
sudo apt updateInstall necessary essential packages including curl, wget, and apt-transport-https, running the below command:
sudo apt install -y curl wget apt-transport-https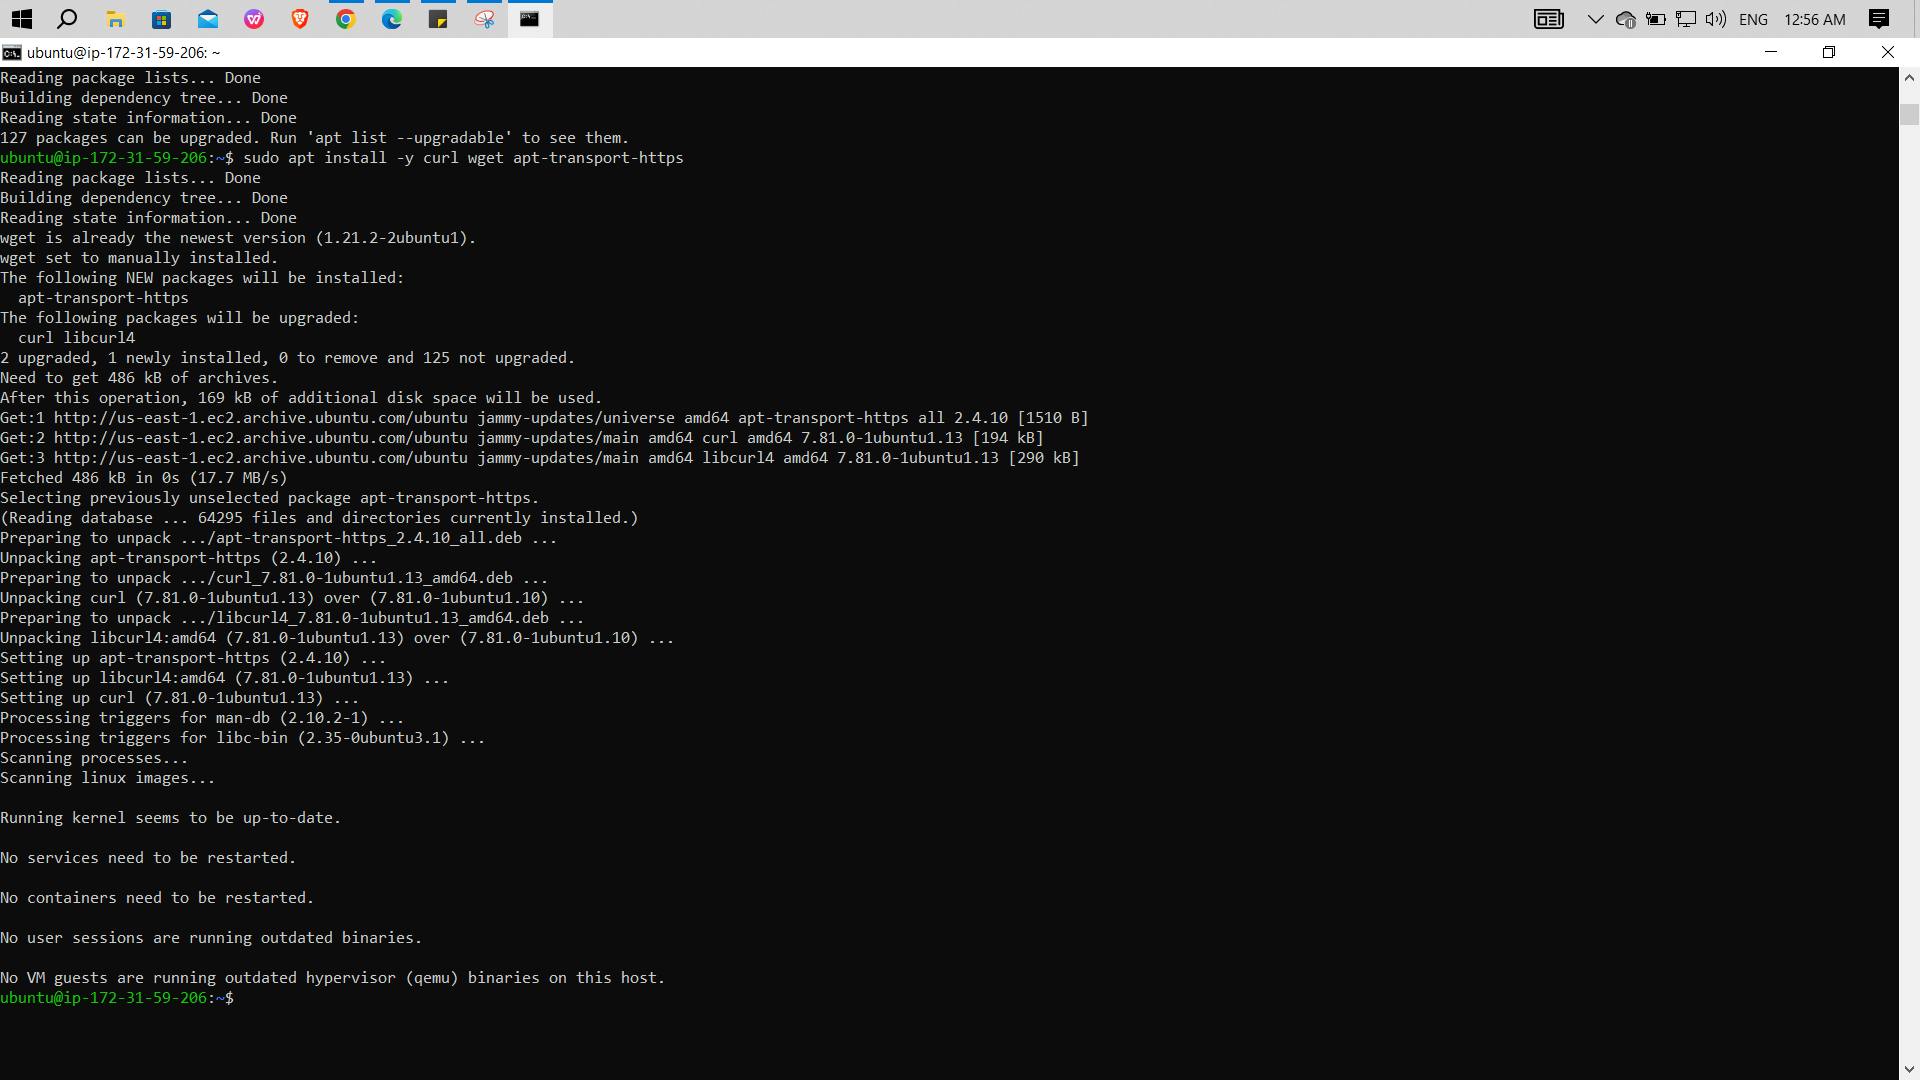
Install and start docker and configure it to launch on system startup, run the below commands:
  # Install docker
   sudo apt install docker.io

   # add the current user to the "docker" group
   sudo usermod -aG docker $USER

   # Start & enable docker
   sudo systemctl start docker
   sudo systemctl enable docker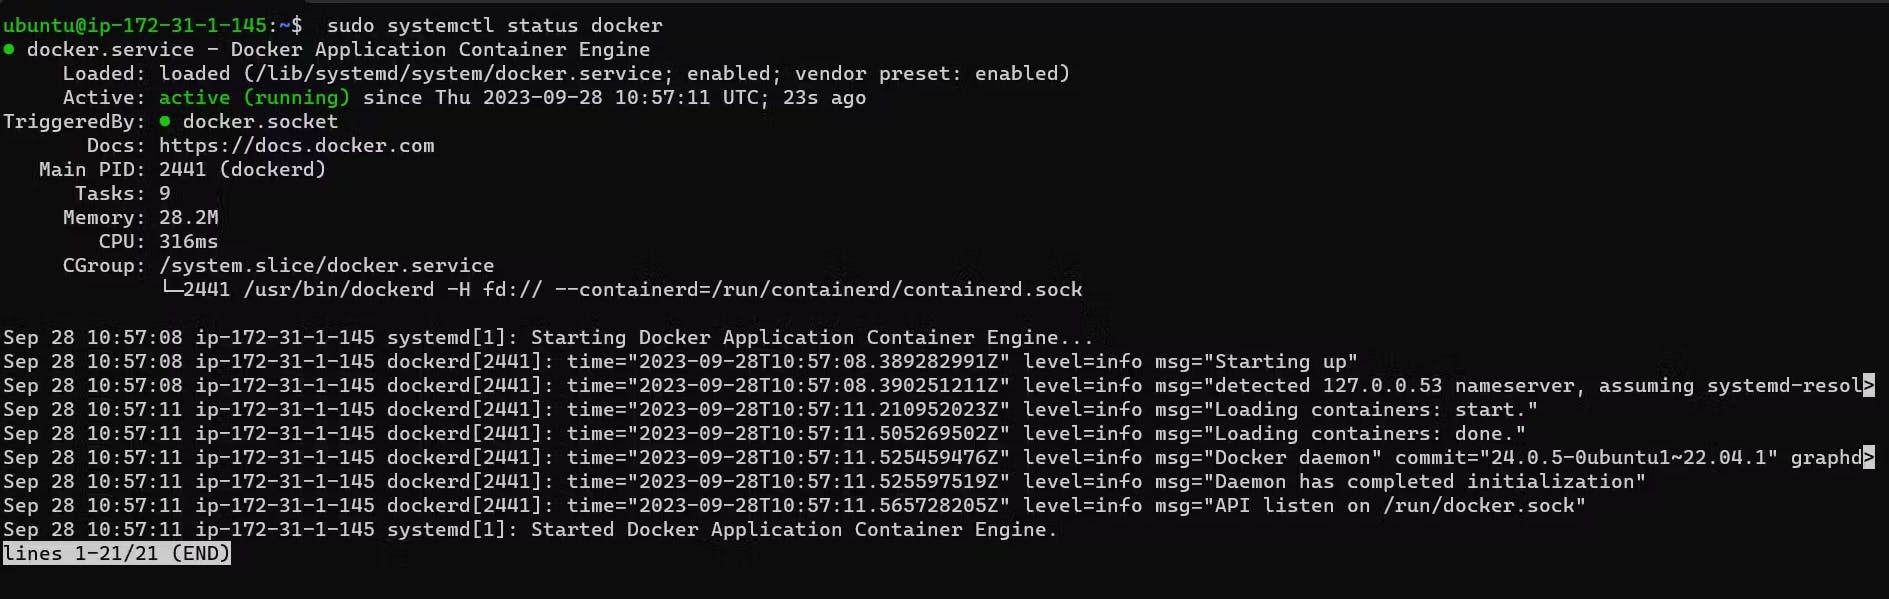

Download the kubectl binary using curl, make it executable, and add it to your system's PATH:
 curl -LO "https://dl.k8s.io/release/$(curl -L -s https://dl.k8s.io/release/stable.txt)/bin/linux/amd64/kubectl"
 chmod +x kubectl
 sudo mv kubectl /usr/local/bin/
Now start the minikube.
minikube start --driver=docker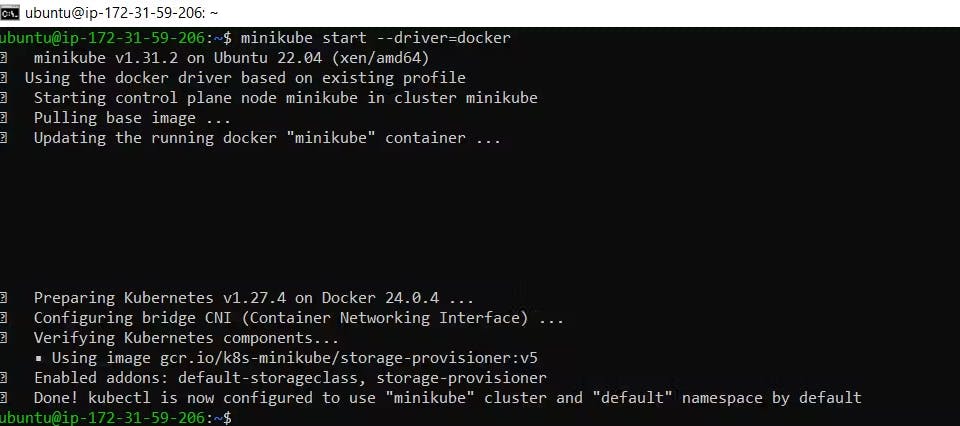
Check the minikube status is it installed or not and check the nodes as well.
 minikube status
 kubect get nodes
Create your first pod on Kubernetes through minikube.
Start Minikube (if not running).
minikube startCreate a Pod YAML Manifest.
vim first-pod.ymlCreate a YAML file that describes your pod. In the K8s for every task create a manifest file.
In the manifest file, we are passing values:apiVersion → Kubernetes Version Kind → Type of deployment metadata → More Details about pod container → Details of containers in object containerPort → The port where the pod will deployFor example, you can create a simple pod named first-pod in the YAML file named
first-pod.ymlwith the following content:#first-pod.yml apiVersion: v1 kind: Pod metadata: name: nginx spec: containers: - name: nginx image: nginx:1.14.2 ports: - containerPort: 80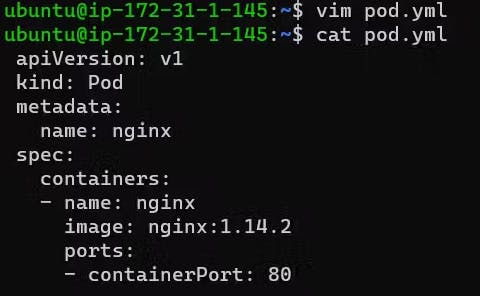
Run the kubectl command to create a pod.
kubectl apply -f pod.yml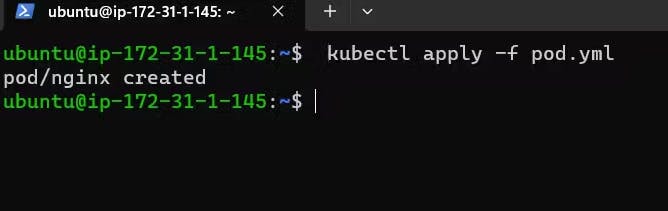
Check the pod's status by kubectl get pods, you can see a NGINX pod is created successfully by it's status.
kubectl get pods
Run the below command to get more detailed information about the pod-like IP, node, age of node, and status.
kubectl get pods -o wide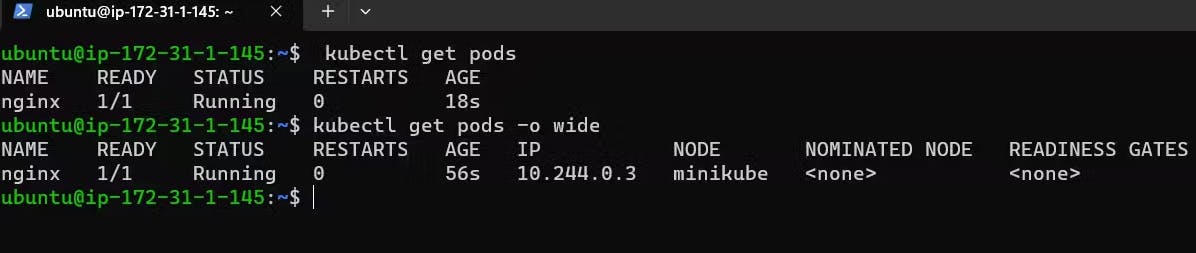
To check if nginx is running locally or not, do we have to ssh the minikube go inside the minikube cluster. Then curl the IP address of the pod.
   #Get the IP
   kubectl get pods -o wide

   # SSH into minikube
   minikube ssh

   # Curl the IP address to access the NGINX
   curl http://<IP-Addr>
Create NGINX pod on K8s through Kubeadm
Installation steps of Kubeadm, Refer this : Kubeadm Installation.
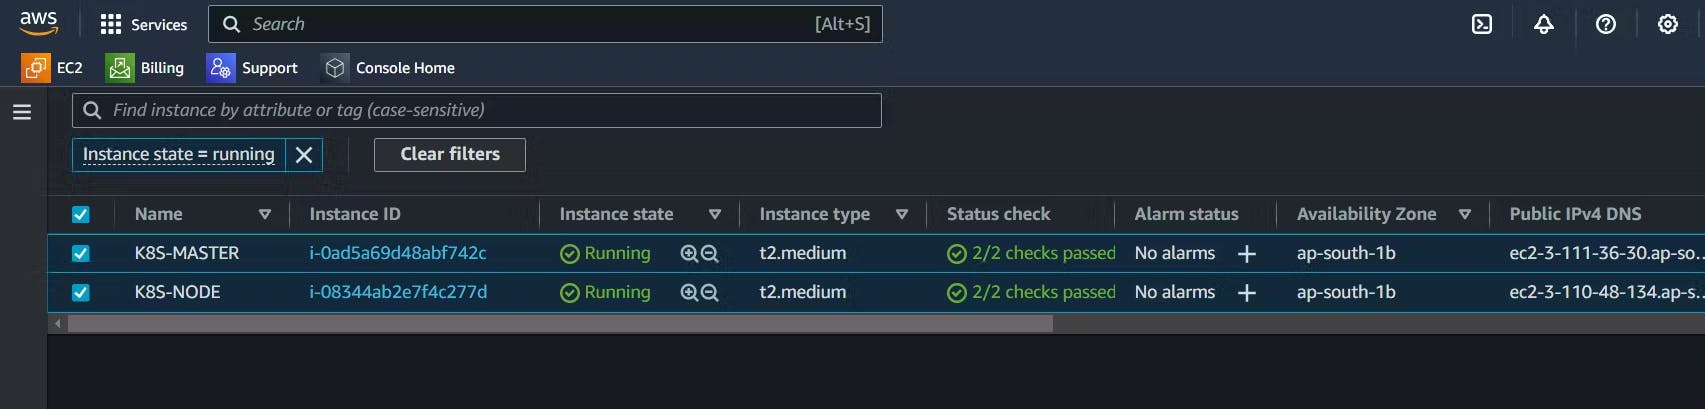
Create 2 VM instances for Master and Node.
Install Docker on both Master & Node
 sudo apt update -y
 sudo apt install docker.io -y

 sudo systemctl start docker
 sudo systemctl enable docker
 sudo systemctl status docker
Install Kubeadm on both master and node using the below commands:.
 sudo curl -fsSLo /usr/share/keyrings/kubernetes-archive-keyring.gpg https://packages.cloud.google.com/apt/doc/apt-key.gpg

 echo "deb [signed-by=/usr/share/keyrings/kubernetes-archive-keyring.gpg] https://apt.kubernetes.io/ kubernetes-xenial main" | sudo tee /etc/apt/sources.list.d/kubernetes.list
Again update the system.
sudo apt update -yInstall Kubeadm, Kubectl and Kubelet in both Master and Node using the below command:
sudo apt install kubeadm=1.20.0-00 kubectl=1.20.0-00 kubelet=1.20.0-00 -yConnect Master with Node. Initialized Kubeadm. Run the following command only on Master:
 sudo su
 kubeadm init
Setup the kube config for the current user.
 mkdir -p $HOME/.kube
 sudo cp -i /etc/kubernetes/admin.conf $HOME/.kube/config
 sudo chown $(id -u):$(id -g) $HOME/.kube/config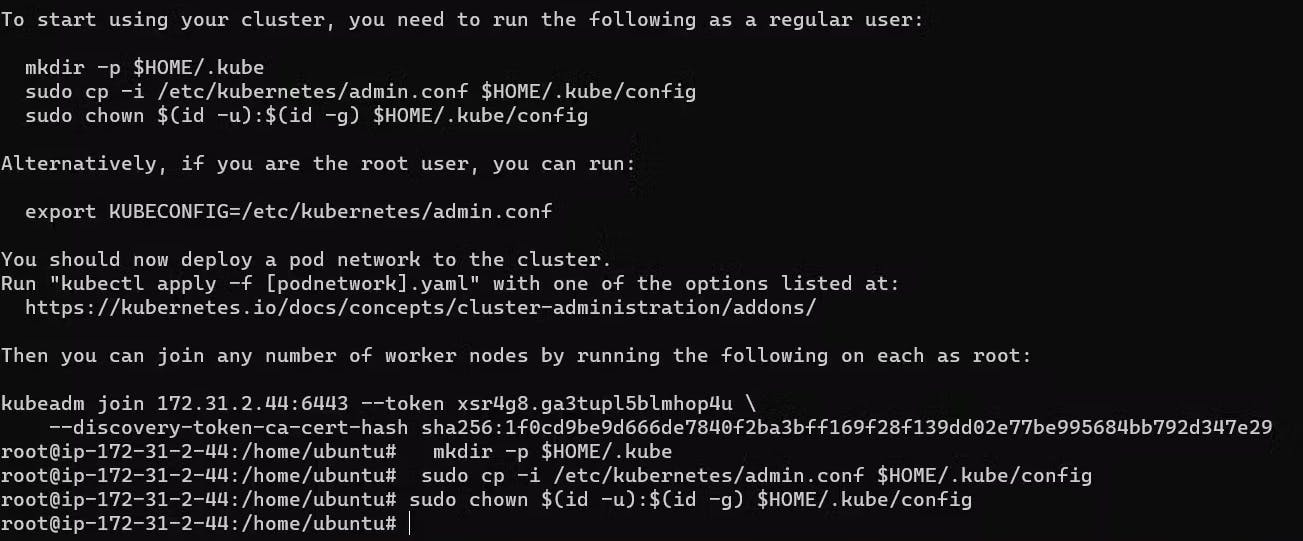
Finish the Master Setup using the following Command:
kubectl apply -f https://github.com/weaveworks/weave/releases/download/v2.8.1/weave-daemonset-k8s.yaml
Now create a token to join the Master & Node connection.
kubeadm token create --print-join-command
We will get nodes for master.
kubectl get nodes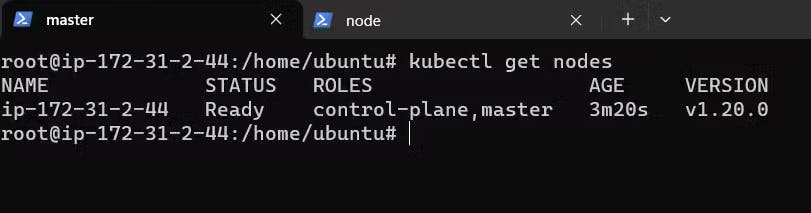
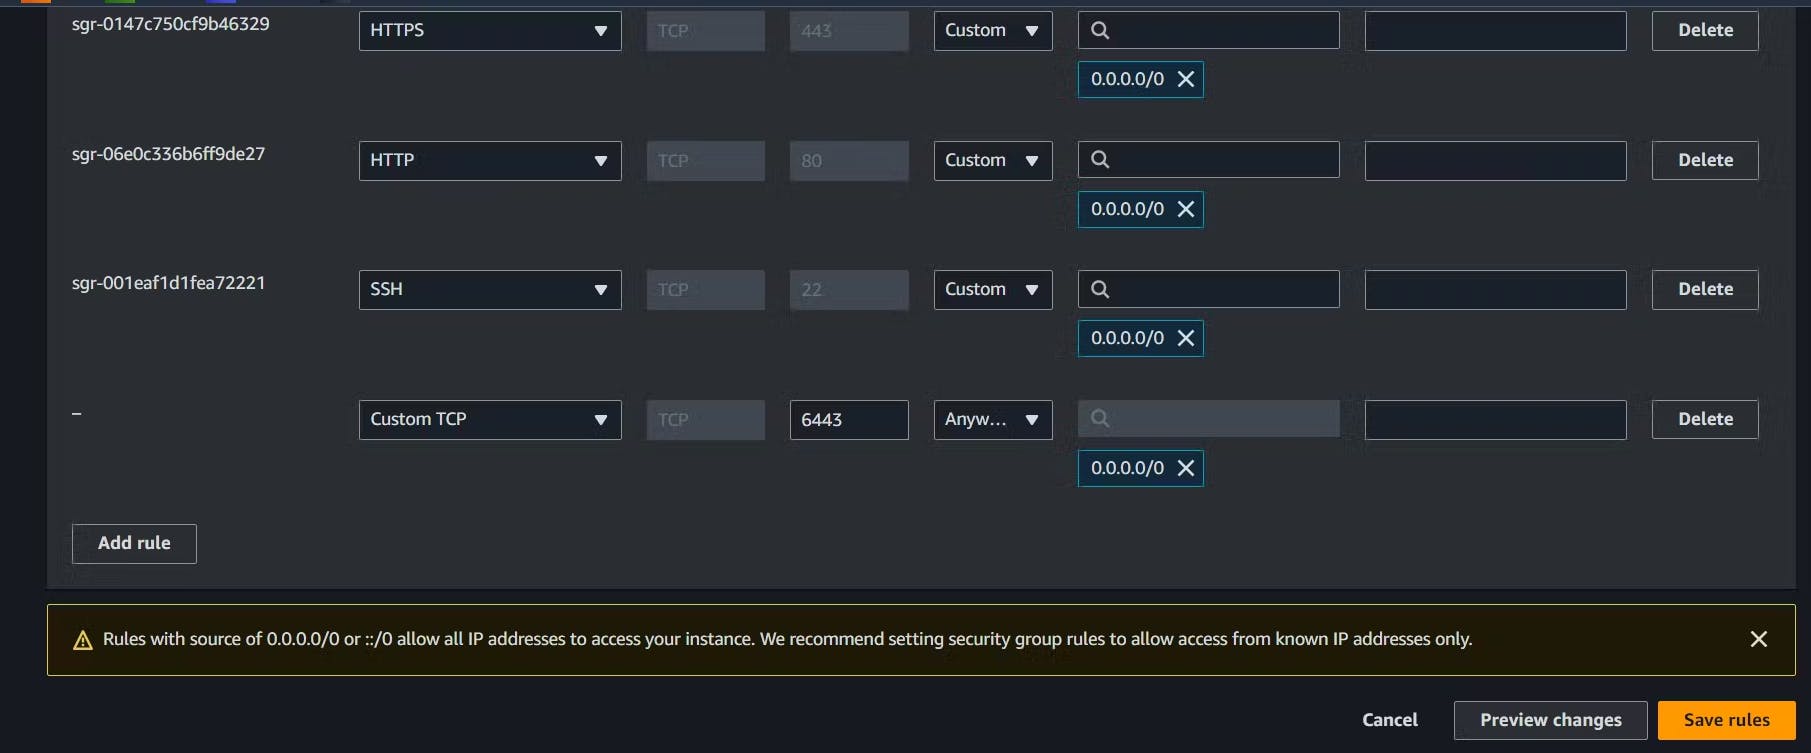
After that add port 6443 in master instance under inbound rules in security group.
Then on the Worker Node reset the checks so it can't assign as Master.
sudo su
kubeadm reset pre-flight checks
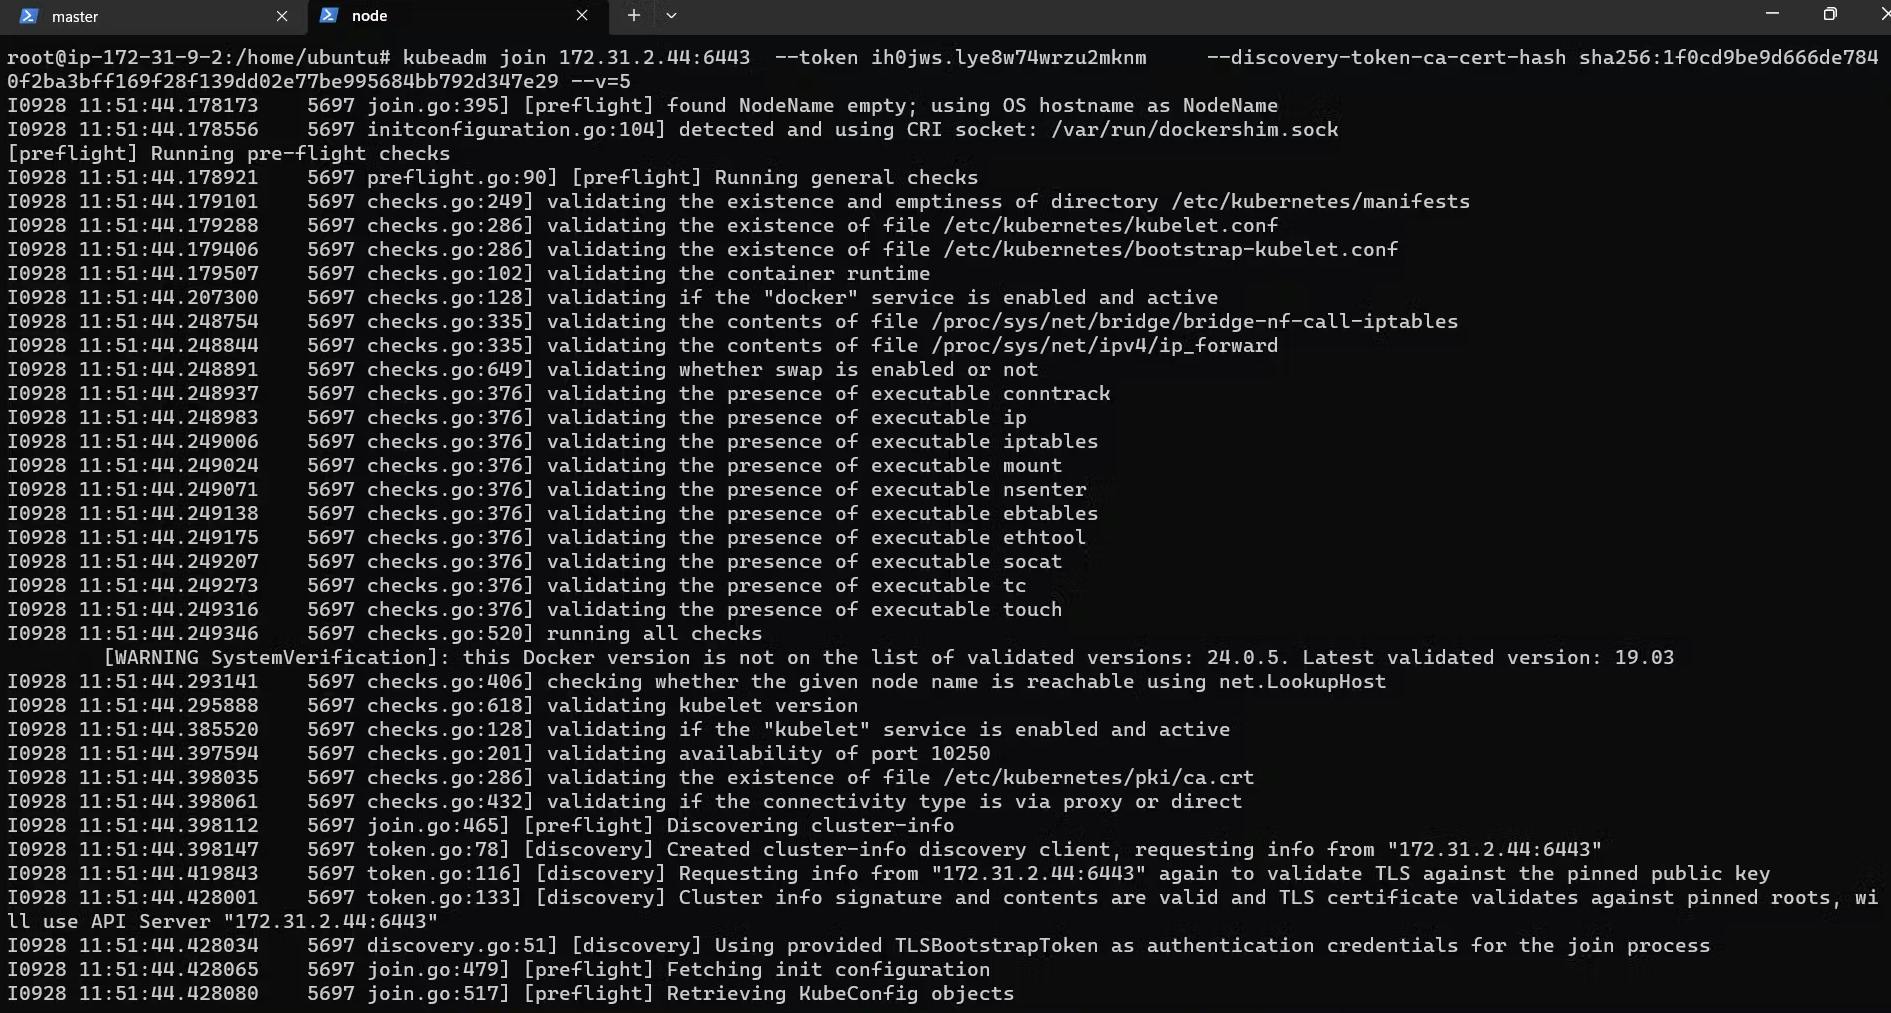
Paste the Join command on the worker node and append --v=5 at the end.
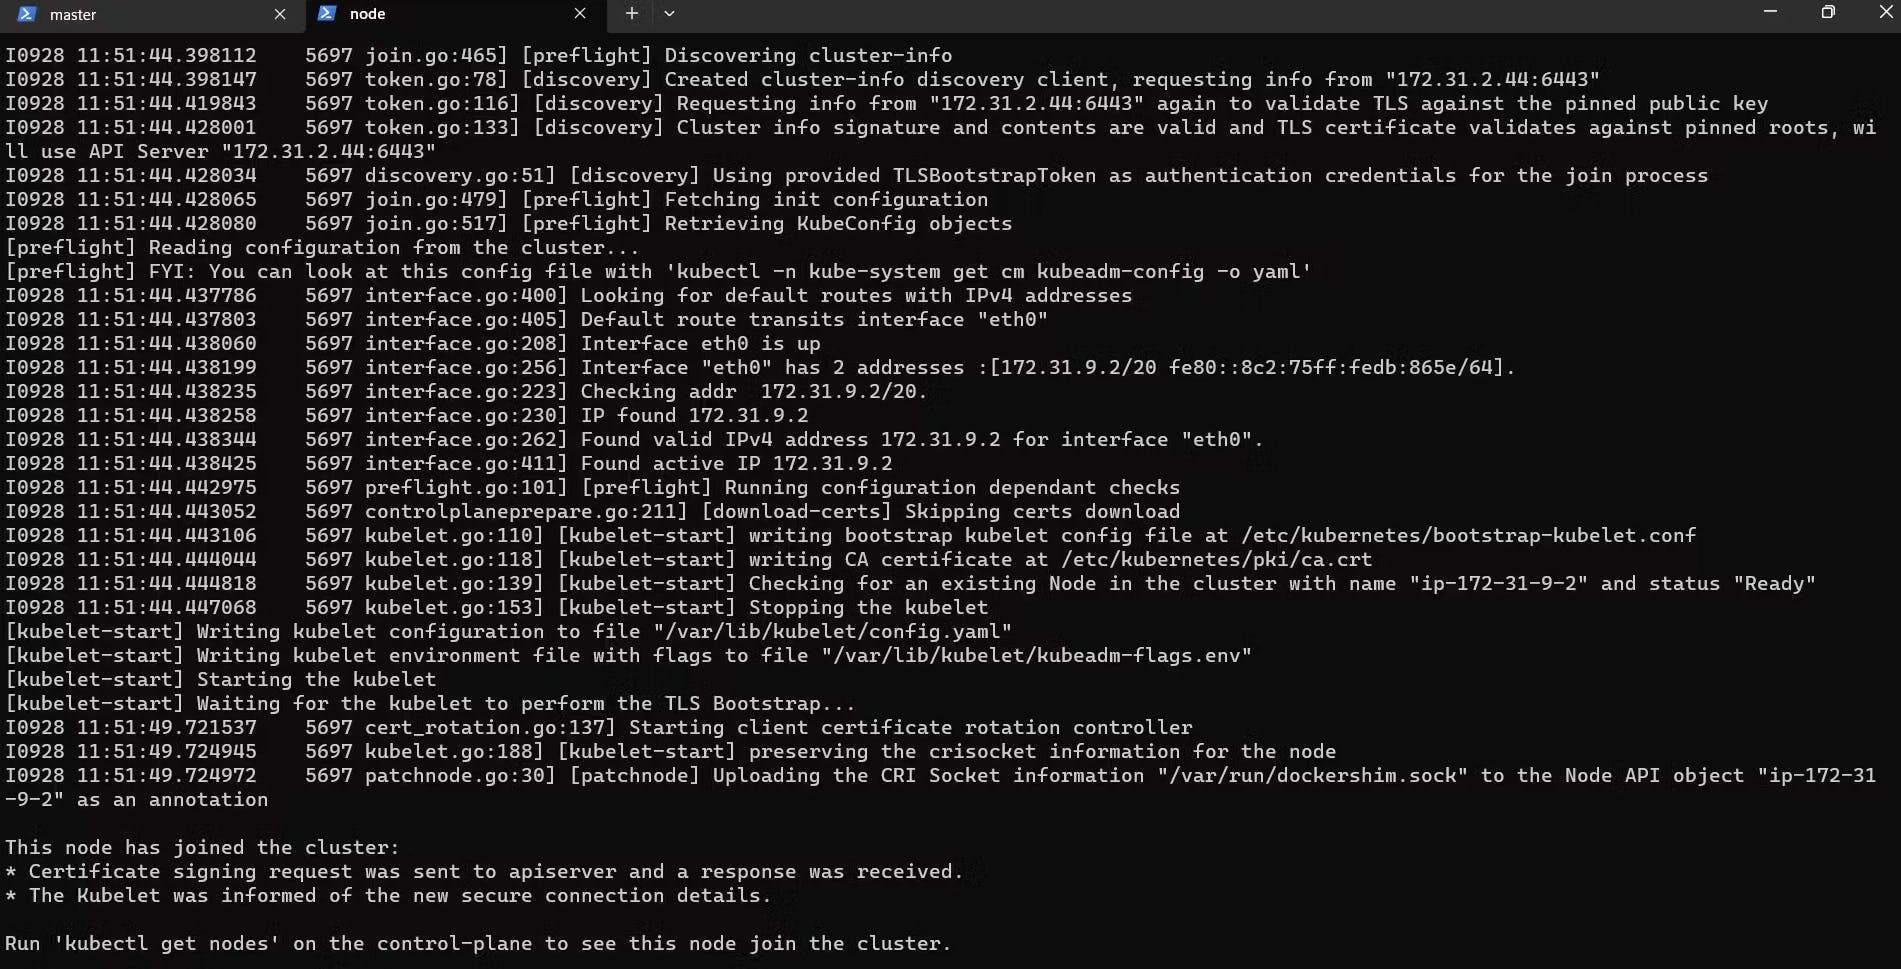
Verify by running the command in Master:
kubectl gets nodes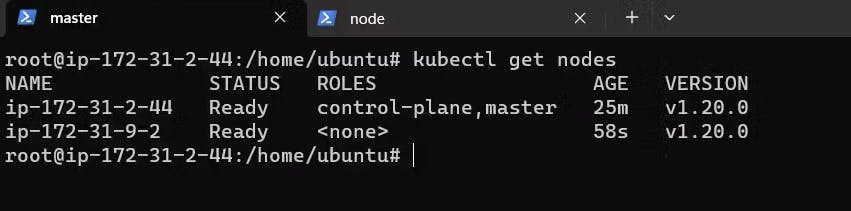
Create the Nginx Pod
By default, the kubectl run command creates a deployment and a replica set along with the pod. If you only want to create a pod without creating a deployment or replica set, you can use the --restart=Never flag.
But if you pass --restart=Always, if your pod is deleted or having an issue, then a new pod will be replaced immediately.
kubectl run nginx --image=nginx --restart=Never
Now we can see the docker container in the worker node.
docker ps
To check if the pods are running or not
kubectl get pods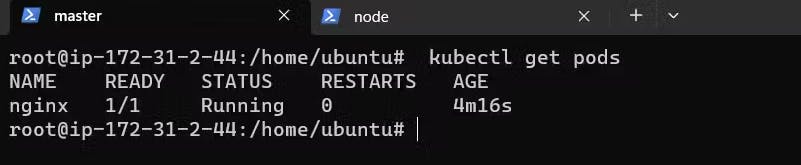
Get the details of the pod.
kubectl get pods -o wide
To delete a pod.
 kubectl delete pod  <pod-name>

 Ex: kubectl delete pod nginx
Conclusion
In conclusion, Minikube, Kubeadm, and Pods are essential components in the Kubernetes ecosystem.
Minikube: It is a tool that facilitates running a single-node Kubernetes cluster locally for development and testing purposes. Minikube simplifies the deployment and management of Kubernetes on a personal machine, allowing developers to experiment with containerized applications.Kubeadm: Kubeadm is a command-line utility that streamlines the process of setting up a basic Kubernetes cluster. It is designed to be a fast and efficient way to bootstrap a cluster, making it easier for administrators to deploy and manage Kubernetes on different platforms.Pods: Pods are the smallest deployable units in Kubernetes, representing a single instance of a running process. They encapsulate one or more containers and share the same network namespace, allowing them to communicate seamlessly. Pods are fundamental to the Kubernetes architecture and serve as the building blocks for deploying and scaling applications.
Together, Minikube and Kubeadm provide tools for local development and cluster initialization, while Pods enable the deployment of containerized applications within the Kubernetes ecosystem. These components work in harmony to create a robust and scalable platform for container orchestration and management.
Hope you find it helpful🤞 So I encourage you to try this on your own and let me know in the comment section👇 about your learning experience.✨
*👆The information presented above is based on my interpretation. Suggestions are always welcome.*😊
~Smriti Sharma✌